About LIBERTY™ Flashing Cement
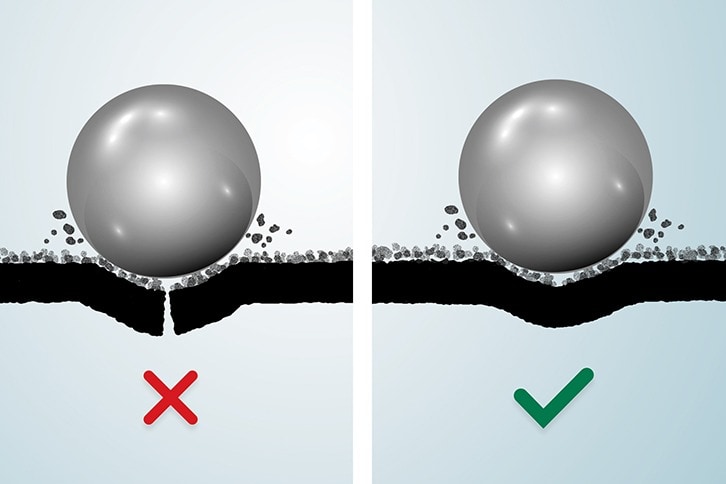
Seal a variety of roof materials with LIBERTY™ Premium Flashing Cement. This bonding agent works with shingles, metal, built-up asphalt, SBS modified bitumen membrane end laps and perimeter edges, metal-edge flashing, gutter seams, and air conditioning ducts. This product provides bonding strength and flexibility while being easily applied with a 1/4” notched trowel or squeegee.
Installation based on applicator type:
- Membrane flashing: Apply cement at 1 to 2 gallons per square (.4 – .8 L/m2) to substrate only.
- Coursing: Apply cement to surface and install glass, polyester fabric, or asphalt-coated cotton fabric into cement. Repeat as wanted. Finish with a final layer of cement.
- Metal: Prime metal. Set metal flanges into a full bead of 1/8” (3mm) thickness. Apply cement between joints and apply pressure so that a bead of cement is visible at joint edge.
- Sealing/repairs: Apply cement at a 1/8 inch (3 mm) to 1/4 inch (6 mm) thickness, working the cement into the opening or crack and spreading beyond repair area approximately 2” – 4” (51 – 102 mm).
A cold-applied bonding agent for a wide variety of roofing components
LIBERTY™ Flashing Cement is ideal for a wide variety of sealing, bonding, and repairing applications in areas where temperature-related expansion and contraction occurs.
-
CONSISTENCY
Trowel-grade consistency makes it ideal for flashing details, attaching membrane to steep slopes and parapet walls, and a variety of roofing and waterproofing repairs. -
STRENGTH AND FLEXIBILITY
This product offers excellent bonding strength and high flexibility to accommodate temperature-related expansion and contraction of the roof system. -
CONVENIENT APPLICATION
This product can be applied with a 1/4” notched trowel or squeegee, and it maintains excellent low-temperature flexibility.

LIBERTY™ step-by-step installation video
Step-by-step instructions show you how to install a LIBERTY™ low-slope roofing system.
LIBERTY™ Installation — Step-by-step*
-
Step 1
Inspect the roof, and repair or replace damaged areas. -
Step 2
Apply LIBERTY™ Asphalt Primer at a rate of a 1/2 gallon per 100 sq. ft. -
Optional (for 2-ply system):
Install LIBERTY™ Self-Adhering Base/Ply. -
Step 3
Install edge flashing at all eave and rake edges, and apply LIBERTY™ Flashing Cement on exposed flange. -
Step 4
Install LIBERTY™ Self-Adhering Cap Sheet. -
Step 5
Clean up by removing tools, unused materials, and other debris. Plan on inspecting roof annually if possible.
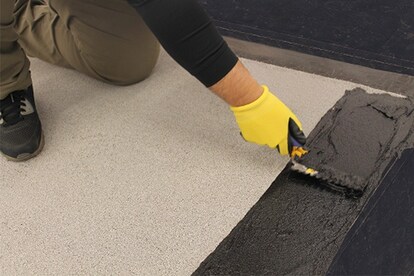
*See application instructions for complete details.
Product Documentation
-
-
Liberty Flashing Cement Sell Sheet RESLB403
Data Sheets
-
Liberty SBS Self-Adhering Roofing System Calculator - RESLB507
Installation Instructions and Guides
-
Liberty System Installation Instructions TRILINGUAL - RESLB504
Installation Instructions and Guides
-
Liberty System Sell Sheet - RESLB100
Data Sheets
-
LIBERTY™ Flashing Cement SDS - 4132
Safety Data Sheets
-
-