Your roof is composed of many critical parts, and roof valleys are among the most essential. A roof valley forms where two planes meet, creating a channel that directs water safely into the gutter system. This drainage prevents standing water and moisture buildup, helping protect your roofing materials and extend their lifespan.
While you don't often hear much about roof valleys until roof repairs or replacements are needed, understanding how a roof valley works can help you make better decisions for your home. This guide covers the basics of roof valleys, including the two main types, common issues, materials, and maintenance tips.
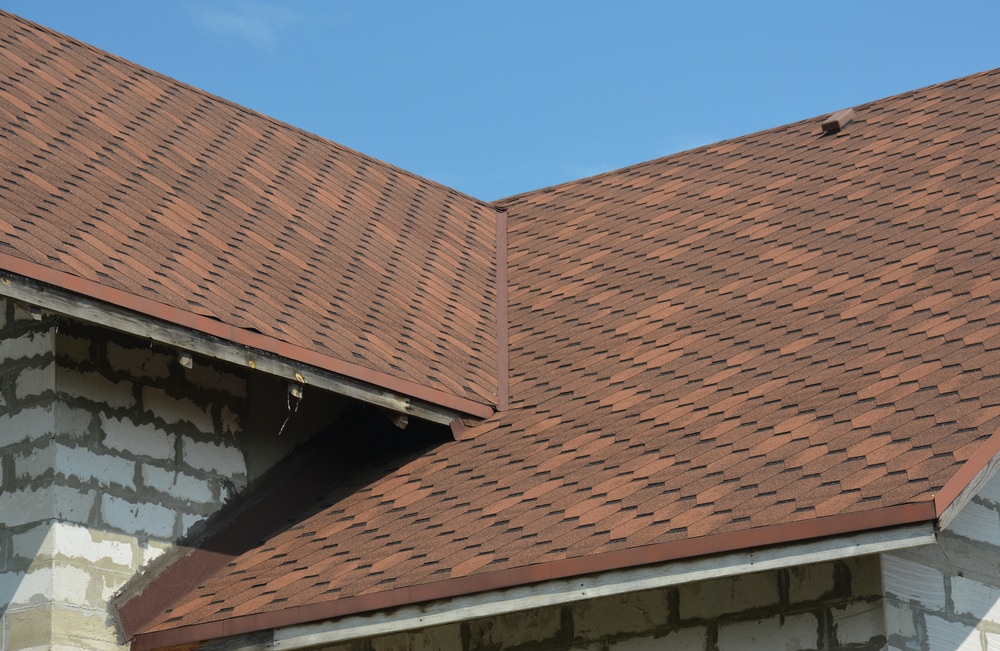
What Is a Roof Valley?
A roof valley is the internal angle that forms where two sloping roof sections meet. Its main job is to direct water off the roof and into gutters where it can drain away, preventing water from pooling and causing damage. Roof valleys are essential for keeping your roof dry and intact, especially during heavy rain or snow.
Types of Roof Valleys
There are two types of roof valleys: open valleys and closed valleys. The type used on your roof depends on your local weather, design preferences, and roofing materials. For example, three-tab and architectural asphalt shingles often pair with closed valleys, while heavier materials, like slate or tile, tend to use open valleys.
Open Valleys
Open valleys feature visible metal flashing that runs along the length of the valley. Typically made from steel, copper, or aluminum, the flashing is installed over an ice and water shield underlayment. Open roof valleys have several advantages, such as superior drainage and added durability since metal resists water better than shingles.
However, open valleys have some potential downsides. They can be more expensive, may not suit every home's appearance due to their metal visibility, and are vulnerable to leaks if improperly installed.
Closed Valleys
Closed valleys are completely covered by shingles, creating a uniform appearance across the roof surface. Beneath the shingles, an ice and water shield underlayment typically protects the roof deck in case water were to infiltrate the shingles. There are two styles of closed valleys:
- Woven valleys: Shingles from each plane are woven together, creating a smooth, continuous appearance.
- Closed-cut valleys: Shingles are cut precisely where the planes meet, meaning they'll have a visible line along the valley.
Some homeowners prefer closed valleys for their uniform appearance, which may be considered more aesthetically pleasing, and lower cost, since you can simply use the shingles you already have on your roof rather than investing in new materials. However, closed valleys require precise installation to prevent leaks.
Common Problems with Roof Valleys
As a critical piece of your roof's drainage system, roof valleys are bound to come into heavy contact with moisture, making them highly susceptible to leaks and damage. They can also trap debris, like dirt, leaves, and twigs, leading to clogs that allow moisture to seep under the shingles.
You can look out for a few telltale signs of roof leaks and other issues in the roof valley, including:
- Water stains on the ceilings or walls inside your home
- Mold or mildew in the attic (odor or visible presence)
- Visible damage to shingles or flashing
While these issues can feel like a nuisance to fix, ignoring them can lead to major—and more expensive—repairs. Left unchecked, mold and water damage can spread beyond the roof to your home's interior structure.
Proper Installation and Maintenance of Roof Valleys
Since roof valleys can be a vulnerable point in a roofing system, both open and closed valleys must be installed correctly to keep these areas well protected.
Installation Best Practices
For closed valleys, your contractor should install an ice and water shield as the underlayment to protect against leaks. In woven valleys, the shingles must be woven smoothly into one another without bulging where the planes meet. In closed-cut valleys, shingles in the first roof plane should stop 12 inches from the valley's center, overlapping with the second layer and securing nails at least 6 inches from the valley center to help prevent leaks.
An open roof valley installation also starts with adding an ice and water underlayment before the flashing. For maximum effectiveness, the flashing should be at least 24 inches wide, overlapping by 6 inches at the joints and tightly secured to the roof with nails at the edges. Finally, shingles should be trimmed neatly along the flashing, and all exposed nails should be sealed.
Following these best practices is essential to protect your home and extend the lifespan of your roof. As such, consider partnering with a GAF-certified roofing contractor near you to ensure proper installation.
Maintenance Tips
As with any part of the roof, regular roof valley maintenance helps materials last as long as possible. Have debris cleared regularly from roof valleys and surrounding areas, and schedule professional inspections twice a year and after storms. A simple repair can help prevent small issues from escalating into more extensive and costly problems. Damaged roofing materials won't resolve on their own, and water damage will continue to spread and exacerbate any existing damage.
Choosing the Right Materials
Climate and roofing material affect which type of valley and flashing you should use. If you live in a wet climate, such as an area prone to humidity or rainstorms, open valleys with durable metal flashing may be the better choice. In snowy areas, heavier metals, like copper or steel, generally offer greater protection.
Underlayment is necessary no matter the type of roof valley. Use a self-adhering ice and water shield underlayment (no nails or fasteners required) to help prevent leaks. For flashing, galvanized steel, stainless steel, aluminum, and copper are common options. Your choice may come down to aesthetics or budget, with copper being the most expensive and aluminum the most budget-friendly. The weather in your area will also affect which one you use, since copper has the best water resistance, followed by steel and aluminum. A flashing gauge between 26–28 is usually recommended, but your roofer can help determine the best choice for your roof.
Why Professional Installation Matters
The value of hiring an experienced contractor is that you can trust them to follow all the right procedures and use high-value materials when installing or repairing your roof valleys. The small details, like knowing where to nail and how far apart to do it, can make a bigger difference than you might think.
Since roof valleys are susceptible to leaks, professional experience and training are necessary to ensure proper care. Attempting DIY repairs or hiring inexperienced contractors can lead to poor performance and costly repairs later on, so always work with a trusted, qualified roofing professional for inspections, maintenance, and installations.
Roof valleys are a crucial component of your roof's structural integrity, safely channeling moisture and debris away from vulnerable areas. Choosing the right valley type, materials, and contractor—and committing to regular maintenance—will help protect your roof and home for years to come.
