TPO membrane installation is easier than ever with these tips from GAF Senior Commercial Training Specialists Dave Scott and Wally Brown from the "Roofing it Right" video series. From seam direction to installing "fingers" for better wind uplift resistance, these two roofing pros provide the critical information you need to make your TPO installation process as smooth as possible from start to finish.
How to Install TPO Membrane: A Step-by-Step Guide
Follow these steps for a successful TPO membrane installation.
Step 1: Minimize Mess
Dave and Wally recommend covering your shoes with booties to help keep the white TPO membrane cleaner while working. This time-saving tip helps minimize cleaning at the end of the installation.
Step 2: Prepare the Drains
Prepare drains with FlexSeal™ Caulk Grade Sealant or EverGuard® Water-Block—one full tube per drain—before rolling out the membrane.
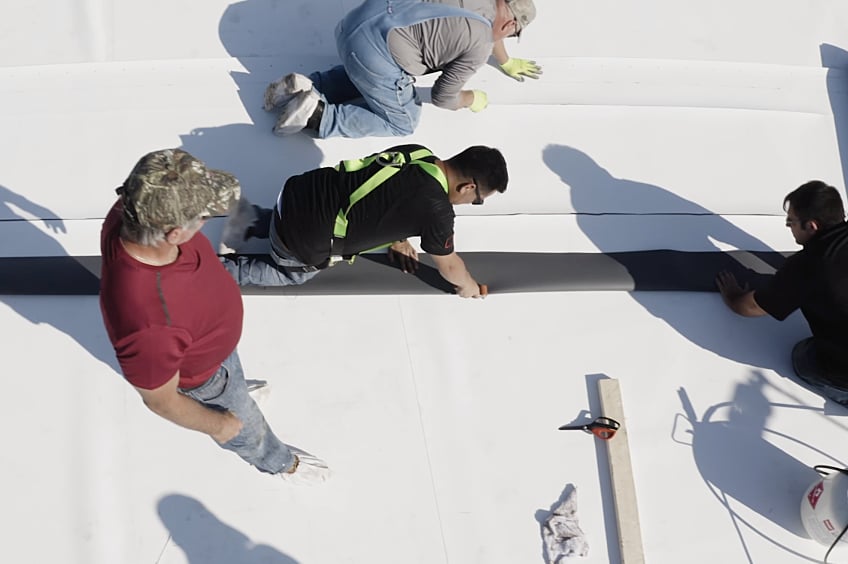
Step 3: Roll Out and Fasten the Membrane
With the drains prepped, roll out the membrane, running the TPO sheets perpendicular to the deck. Once the fasteners are placed and spaced correctly, mechanically fasten them using base attachments. Cut out and mark the drain areas to prevent the crew from walking on them.
To cover the fasteners, roll out the second sheet of membrane with a 6-inch overlap over the first sheet.
Step 4: Weld the Seams
Use a robot welder to weld the seams. Wally put his settings at 10 feet per minute at 900°F. The settings can vary based on jobsite conditions, including ambient temperature. Wally performed test welds ranging from 600°F to the robot's max temperature of 1,148°F. Using test probes, he determined the ideal temperature to be 900°F.
Step 5: Add Fingers for Wind Uplift Protection
To install the fingers, measure halfway between the two seams, so you're in the middle of the membrane sheet. Place and secure fasteners 12 inches on center, running the same direction as the seams, and install a piece of membrane over the fasteners using the robot welder to secure the membrane. Be sure to clean the membrane with water before welding.
Step 6: Install the Parapet Wall Flashing
Once you've measured the membrane needed for the wall flashing, fold it over and use your hand roller to create a crease. This helps the TPO square up to the wall and stay in place while installing it to the parapet.
Making the TPO Installation Process a Breeze
These installation tips apply to both Everguard® TPO Smooth Membranes and other options, such as EverGuard® TPO Fleece-Back Membranes. No matter which system you're installing, GAF offers professional resources to help you do your best work.
